 EN
EN
Grid Structure Installation Methods: Detailed Procedures and Practical Application
The installation of grid structures is a pivotal step in construction projects, as it directly impacts structural safety, construction efficiency, and overall project costs. Given the varied types of grid structures—such as square pyramid grids, triangular pyramid grids, and planar grids—and the differing site conditions (including span size, surrounding environment, and available equipment) across projects, three primary installation methods have been refined in the industry. Each method boasts unique operational logic, applicable scenarios, and trade-offs, requiring careful selection based on specific project requirements.
1. Integral Welding and Hoisting Method: Efficient Installation for Large-Span Regular Structures
The integral welding and hoisting method follows a "ground prefabrication, integral lifting" workflow, making it ideal for large-span buildings with regular grid structures—such as stadiums, exhibition halls, and large-scale industrial workshops. Its core advantage lies in concentrating most of the complex assembly work on the ground, minimizing high-altitude operational risks and improving efficiency.
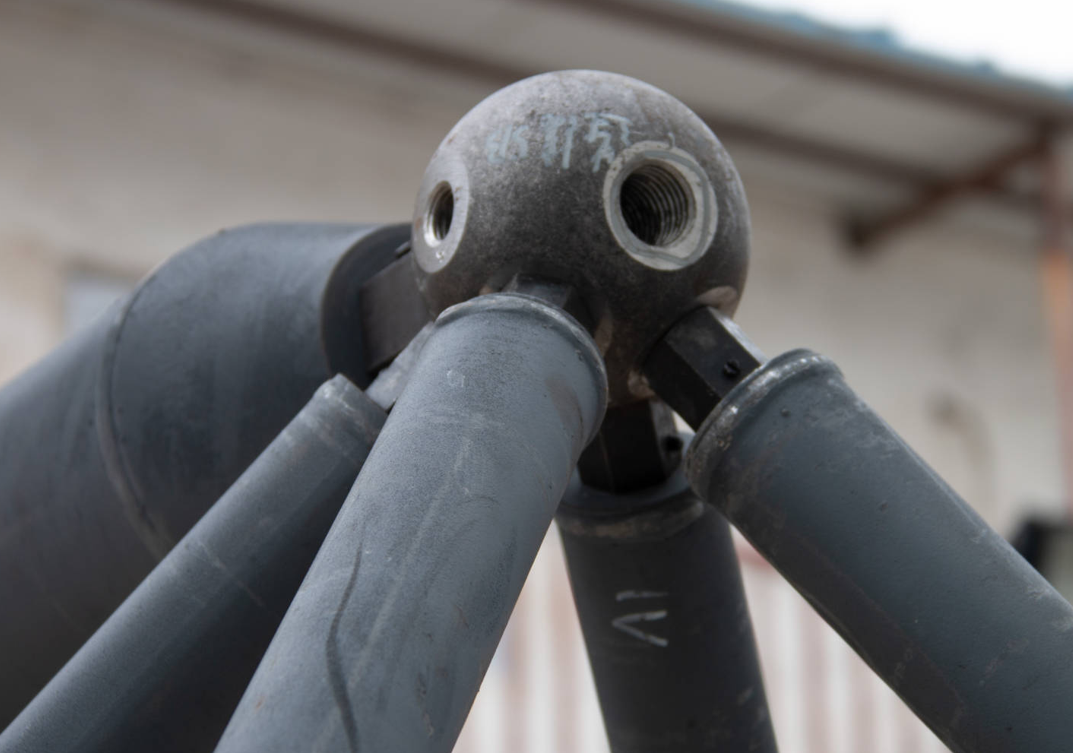
The specific process unfolds in three key stages. First, during the ground integral welding phase, a flat and stable assembly platform is built on the construction site—typically using reinforced concrete cushions or steel plates to ensure the platform’s levelness, as even minor unevenness can affect the grid’s final shape. Construction teams then weld grid components (including steel pipes, bolted ball nodes, and welded hollow spherical nodes) into a complete integral structure according to design drawings. Precision tools like theodolites and laser levels are used throughout to calibrate dimensions and flatness, ensuring the assembled grid meets strict design tolerances. Any welding defects, such as incomplete penetration or slag inclusion, are repaired immediately to avoid compromising structural integrity.
Next comes the integral hoisting phase. Specialized hoisting equipment—such as large-tonnage tower cranes or crawler cranes—is deployed, with lifting points set at pre-calculated positions on the grid (usually at nodes with strong load-bearing capacity) to ensure balanced stress during lifting. The hoisting process requires strict synchronization: all cranes lift at the same speed to prevent structural deformation from uneven forces. Once the grid is lifted to the design height, it is hovered for 15–30 minutes. This hovering period serves two purposes: to check the stability of the hoisting system (including cables and lifting hooks) and to observe the grid’s stress deformation—any abnormal sagging or twisting triggers an immediate pause for adjustment.
Finally, in the fixed connection phase, workers weld or bolt the grid’s frame to the building’s pre-embedded steel plates or supporting columns, forming a rigid connection with the main structure. Post-connection inspections use ultrasonic testing to verify the quality of welds or bolt tightness, ensuring the grid can withstand long-term loads like dead weight, live loads, and wind forces.
This method’s greatest strength is its fast construction speed—ground assembly allows for parallel work (e.g., simultaneous grid welding and main structure construction), shortening the overall project timeline. However, it demands a highly skilled operation team (including certified welders, professional hoisting commanders, and structural engineers) to coordinate the process. It also requires sufficient ground space for assembly and large-tonnage hoisting equipment, making it less suitable for cramped urban construction sites.
2. High-Altitude Bulk Installation Method: Gentle Operation for Complex or Space-Limited Sites
The high-altitude bulk installation method, often called the "high-altitude step-by-step assembly method," is a more flexible and low-intensity alternative to integral hoisting. Unlike the first method, it involves assembling the grid directly at the design height, making it perfect for projects with limited ground space (e.g., urban buildings surrounded by existing structures) or irregularly shaped grids (e.g., curved or inclined grids that are hard to prefabricate integrally).
The process adheres to a "periphery-to-center" sequence. First, a stable high-altitude operation platform is established—common options include scaffolding, hanging baskets, or temporary steel brackets fixed to the building’s main structure. This platform not only provides a safe standing area for workers but also acts as a temporary support for grid components during assembly, with its load-bearing capacity pre-calculated to handle the weight of workers, tools, and components.
Assembly begins with the peripheral boundary frame. Workers first fix the outermost grid members (such as edge beams and corner nodes) to the building’s supporting columns or walls, creating a stable "reference frame." This frame serves as a benchmark for subsequent assembly and distributes the weight of internal components to the main structure. Next, the team extends inward from the boundary frame, installing and connecting each grid member (steel pipes and nodes) one by one. Real-time calibration is critical here: laser rangefinders and digital levels are used to check each member’s position and angle, ensuring cumulative errors stay within design limits (usually ±3mm for linear dimensions). If a member is misaligned, small adjustments are made using jacks or pullers before final fixing.
Once the entire grid is assembled, the temporary operation platform is dismantled incrementally—starting from the center and moving outward—to avoid sudden load changes on the grid. A final inspection checks the grid’s overall flatness and node connections, with any loose bolts or substandard welds repaired promptly.
This method’s key advantage is its low operational difficulty—it eliminates the need for large-scale ground assembly or heavy hoisting equipment, adapting well to complex site conditions. It also reduces the risk of damage to prefabricated components during transportation (a common issue with integral hoisting). However, its slow construction speed is a notable drawback: high-altitude work is easily disrupted by weather (e.g., strong winds, rain, or extreme temperatures), and the need for step-by-step assembly prolongs the timeline. Additionally, long-term high-altitude operations increase safety risks, requiring strict safety measures (such as double safety belts, anti-fall nets, and regular platform inspections) to protect workers.
3. Block Assembly Method: Modular Installation for Pyramid-Type Grids
The block assembly method is a targeted solution for four-pyramid and triangular pyramid grid structures—two common types composed of multiple independent pyramid units. It combines the efficiency of ground prefabrication and the flexibility of high-altitude assembly, striking a balance between speed and adaptability.
The process has two core stages: ground block prefabrication and high-altitude splicing. First, the entire grid is divided into multiple small "pyramid blocks" based on design drawings—each block typically includes 4–6 pyramid units, with its size determined by hoisting capacity (usually 5–10 tons per block to fit small-to-medium cranes). On the ground, teams prefabricate each block by welding or bolting its components, marking clear alignment lines and connection holes on each block’s interface to simplify high-altitude splicing. Each prefabricated block undergoes dimensional inspection and load testing to ensure it meets design standards—for example, a block’s diagonal error must not exceed 2mm, and it must withstand 1.2 times its rated load without permanent deformation.
In the high-altitude splicing phase, small-to-medium tonnage hoisting equipment (such as truck cranes or mobile cranes) lifts each prefabricated block to the design height one by one. Workers then use slider steps—temporary positioning devices with adjustable horizontal and vertical screws—to align the blocks. These steps compensate for minor hoisting errors: if a block is slightly offset, the slider’s screws are adjusted to shift it horizontally or vertically until its connection holes perfectly match those of adjacent blocks. Once aligned, the blocks are welded or bolted together, forming a continuous grid structure. After all blocks are spliced, the slider steps are removed, and the entire grid undergoes a load test (e.g., applying temporary weights to simulate live loads) to verify its stability and deformation resistance.
This method’s biggest advantage is its strong adaptability to pyramid-type grids—prefabricating blocks on the ground improves efficiency, while slider steps simplify high-altitude alignment. It also avoids the need for large-tonnage hoisting equipment, reducing equipment rental costs. However, it requires precision in block division during the design stage: overly large blocks increase hoisting difficulty, while overly small blocks raise the number of high-altitude splicing points, slowing down work. Additionally, the accuracy of block interfaces is critical—even a 1mm misalignment can make splicing impossible, requiring rework that delays the project.
In conclusion, the three grid structure installation methods each have distinct strengths and applicable scopes. The integral welding and hoisting method excels in large-span, regular structures with ample ground space; the high-altitude bulk method adapts to complex or space-limited sites; and the block assembly method is tailored for pyramid-type grids. When choosing a method, construction teams must comprehensively evaluate factors like grid type, site conditions, equipment availability, and project schedule to ensure safe, efficient, and high-quality installation.